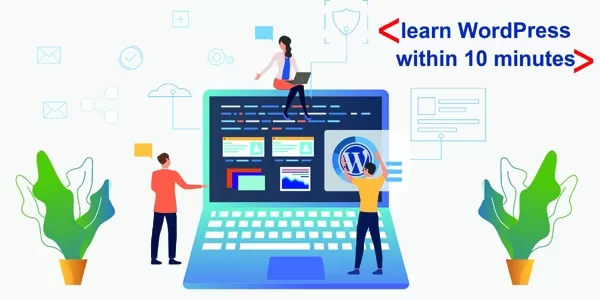
How to learn WordPress within 10 minutes and develop a website using of it?
Table of Contents
- Introduction
- What is WordPress?
- Why should you learn?
- Install WordPress
- Know about Dashboard
- Live the Site
Introduction:
If you want to develop a website for your own but do not have so much coding knowledge do not worry WordPress will help you to full fill your wish.WordPress is one of the most powerful CMS(content management systems), it developed 40 percent of the total websites. WordPress will enable you to design a beautiful site and you can easily customize the functionalities as per your requirements.
What is WordPress:
WordPress is an open-source platform that means you need not take any license, WordPress itself is totally free, and it is an open-source content management system so that you can modify any file in the WordPress package. WordPress website basically consists of a theme and a set of necessary plugins you do not need so much technical knowledge to implement such theme and the plugins.
Why should you learn:
In the beginning, WordPress was developed only for the blog site, it has been used only to develop a single blog site but gradually it is been modified to incorporate about section, gallery section, service section, and many more. Day by day it is started to use to build a complete website in any sector.
Why you should learn because it is a free platform not required to pay for anything and you do not need so much technical knowledge to develop a dynamic website.
Here customization process is very simple, you can easily customize any function as per your client’s requirements. As it is an open-source free platform you can be able to get a huge network in the WordPress domain so sit relax and try to learn this platform for your bright future.
Install WordPress:
I will explain here the WordPress installation process in the local server after that it will move to the live server. To install WordPress on your local server you first need to install XAMPP or WAMP server in your system, these two servers are free and available on the internet. After successfully installing any of the servers on your computer, type http://localhost/phpmyadmin in your browser and create a blank database. Next, you have to download the WordPress file from the official website of wordpress.org and need to place it in a folder under the htdocs folder if the local server is XAMPP otherwise it will be placed under the www folder if the local server is WAMP.
Now type http://localhost/yourfoldername in your browser and you will find a basic setup form, here you need to provide the database name, database username by default it is root and the password is blank.
Know about Dashboard:
I will explain here every section that appeared in the WordPress dashboard.
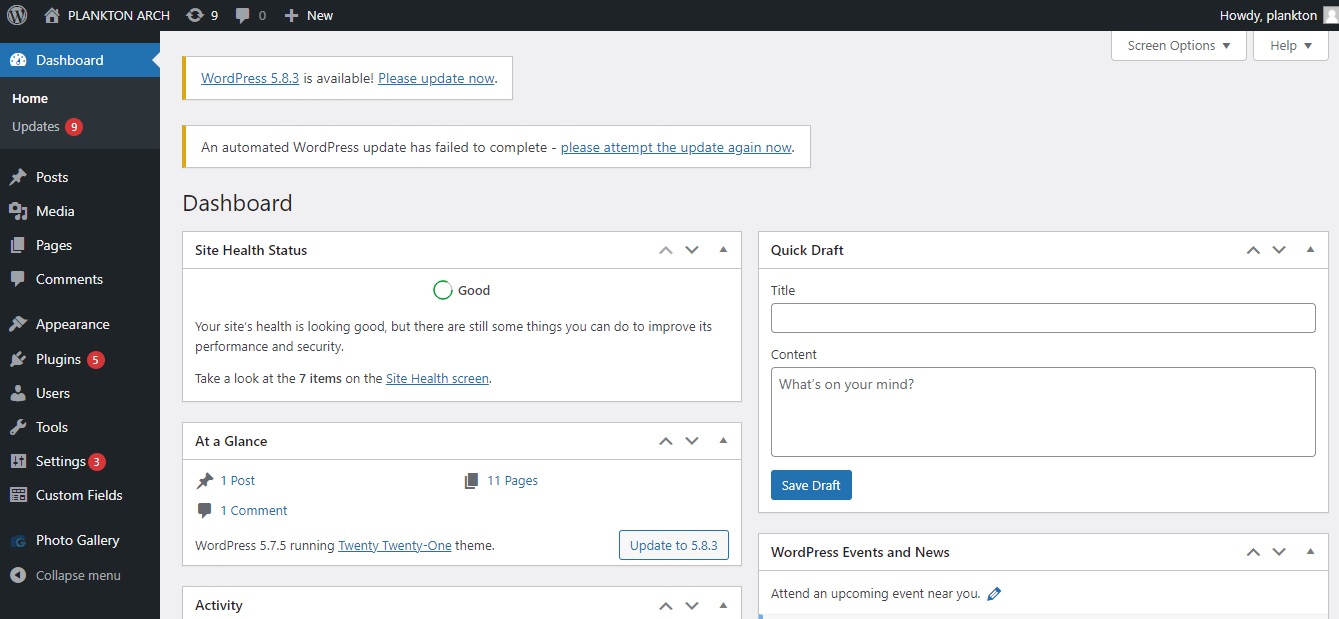
- Posts: This section is used to create a dynamic blog, here you can create multiple posts for your website. Category and tag are available in the post section both these two are used to create a complete blog.
- Media: The media section is held for the repository of the images and videos that are used in your website. From this section, you can modify and edit the image as per your requirements.
- Pages: You can understand by the name page, yes this section helps you to create the pages for your website. You need to put the title and details and do publish to create the page.
- Comments: This section shows you the comment list from your blog post page. You would be able to take action for the individual comment.
- Appearance: This section has basically made of four parts.
- Themes: After installing WordPress on your local computer next you will have to need a WordPress theme to install. There are lots of free themes is available in the market and also you can go for the paid theme but as you started to learn WordPress initially install a free theme and do an experiment on that. Now you will see how to install a WordPress theme to do so you need to go to The WordPress dashboard. Here you will see the appearance and under appearance go to the theme section. Now from here you can directly download and install the freely available theme and you can also upload from your computer. Make sure that your theme is successfully installed.
- Customize: After installing the theme click on customize and set the basic features like header information, color, logo, favicon, social icons, footer information, etc.
- Menus: This section helps you to create the menu for your website. Here you just need to create a menu name and then drag-drop the pages or categories you created before to build a menu.
- Theme Editor: If you need to change in CSS or JS file you can easily do the needful.
- Plugins: Plugins are the small step of functionalities you may need to fulfill your requirements on the site. lots of free plugins are available or you can go for the paid version too. It is very easy to download and install plugins in your project. To install a plugin click on plugins and next add new, here you will see lots of plugins to install or you can directly upload from your computer.
- Users: The user can be the admin or can be the others. This is a role-based admin panel means the admin can create multiple roles for the others.
- Tools: This section is provided the data import and export facilities.
- Settings: The WordPress setting provides the below basic functionalities.
- General: You can set site title, tagline, WordPress Address (URL), Site Address (URL), Administration Email Address, etc.
- Writing: This section provides you to set the Mail server and many more.
- Reading: This section is very important because it helps you to set the home page and post page for your website. You can set the blog section like you can set how many posts will appear on a single page and google will index your website or not. Search engine visibility should be unchecked if you want to encourage Google to index your site.
- Discussion: This section also helps you to set up your blog page. Who can post on your website and is all the user is eligible to comment in a post? Etc.
- Media: Media help you to set the size of the images.
- Permalink Settings: This section will help you to set the URL structure.
Live the Site:
If your site is ready and you want to make the site live, to do so you need to purchase a domain name and a hosting and both should be linked up.
Upload the files in public HTML create a database, import the database files into it, next you need to open the wp-confix.php file and update the database username, database name, and password.
Congratulations your site is successfully launched.
0 COMMENT
RECENT BLOGS
Understanding Schema Markup: Enhancing Your SEO Efforts
24th of July 2023
The Power and Versatility of Node.js: A Comprehensive Overview
11th of July 2023
Do Follow and No Follow Links & Their Usage
21st of July 2022
Top 10 Best Free Web Hosting Sites That You Can Use in 2022
25th of March 2022
Top 10 Website Performance Testing Tools to Use In 2022
25th of March 2022
RECENT COMMENTS
ARCHIVES
CATAGORIES
TAGS
NEWSLETTERS
New posts straight to your inbox
No spam ever. Read our Privacy PolicyThe advantage of partnering with us
We create and promote websites to grow your business. Feel free to contact us to promote your own website by partnering with us. We do website promotion of all bands at a very low cost. We share your company's values with readers through the online world. We would like to talk to you in detail about this.
Talk to Us
alexbeglov1989 On Top 10 Website Performance Testing Tools to Use In 2022